
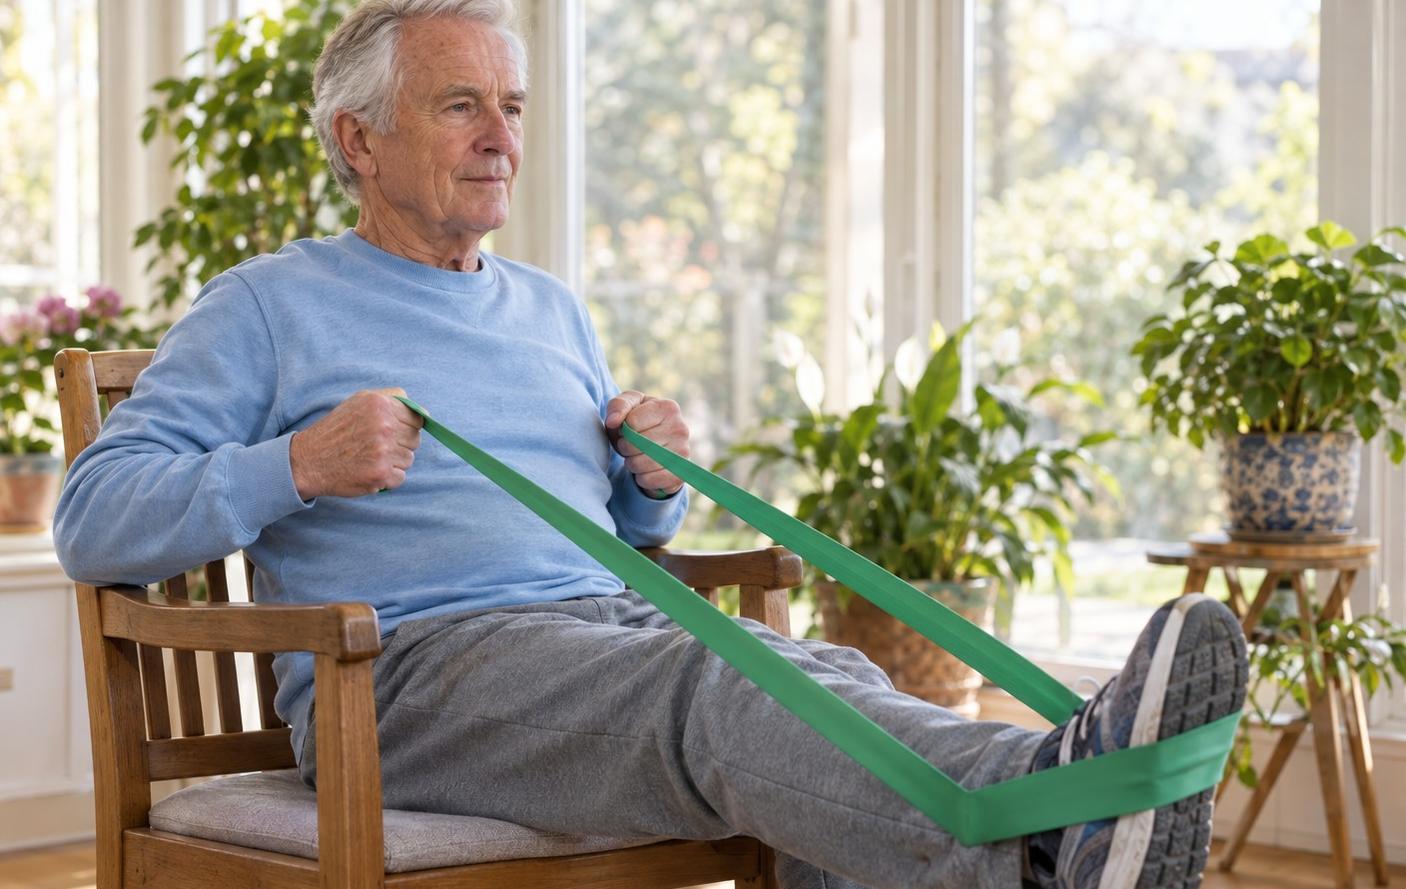
This routine is eight moves with one band, one set of each, done on two days a week. Five moves are seated in a chair. Three are standing beside a chair.
Together they train your back, chest, arms, thighs, hips and the backs of your legs. You do not need a gym or a second band.
This is general information, not medical advice. If you have joint pain, a heart condition or a recent injury, check with your doctor before you start.
The eight moves at a glance
The numbers match the order to follow in each session. Do all eight, one after another.
| Exercise | Seated or standing | What it works | Reps |
|---|---|---|---|
| 1. Seated row | Seated | Upper back, shoulders, arms | 8 to 12 |
| 2. Seated chest press | Seated | Chest, shoulders, arms | 8 to 12 |
| 3. Biceps curl | Seated or standing | Front of the upper arms | 8 to 12 |
| 4. Seated leg press | Seated | Legs | 8 to 12 per leg |
| 5. Seated leg extension | Seated | Thigh muscles | 8 to 12 per leg |
| 6. Standing side leg lift | Standing, hand on a chair | Outer thighs and hips | 8 to 12 per leg |
| 7. Standing hamstring curl | Standing, hand on a chair | Backs of the thighs | 8 to 12 per leg |
| 8. Standing hip extension | Standing, hand on a chair | Buttocks and backs of the thighs | 8 to 12 per leg |
Use a sturdy chair without wheels. The last three are the only moves that must be done standing, and each one has a chair back to hold.
Before your first session
The National Institute on Aging (NIA), the federal agency that leads US research on aging, suggests that beginners learn the movements first. Try each one without the band until you are comfortable with it.
THERABAND, a maker of resistance bands, gives the same advice on its care and safety page. It also says to wear eye protection and to keep the band from snapping toward your head.
Put the band on the chair seat the night before. Then it is the first thing you see in the morning.
Two habits apply to every move:
- Breathe out during the effort and breathe in as you relax. Do not hold your breath.
- Keep each move slow and controlled, and leave your knees slightly soft rather than locked.
Stop if you feel dizzy, short of breath, sick or increasing pain. THERABAND lists those as signs to stop and contact your healthcare provider.
Picking the band tension
Bands come in a flat strip, a closed loop or a tube with handles. A roundup of resistance bands for home workouts names each of these types.
For this routine, a flat strip is enough. Harvard Health publishes health advice from Harvard Medical School. For the leg moves, it describes tying the ends of a strip together to make a loop.
Colors show the tension. Harvard Health says yellow is often the lightest and easiest, followed by red, green, blue and black. The order can vary by brand, so read your own band’s label.
Choose the tension by feel:
- NIA says the effort should reach the point where another repetition would be difficult.
- If the last reps are easy, grip a shorter length of the band. LiveUp and Harvard Health both describe this.
- Do not stretch the band to more than three times its resting length, THERABAND says.
To compare your band with others, read about band types and resistance levels.
Moves 1 to 3: upper body, seated
LiveUp, an Australian healthy-ageing site run by a not-for-profit and funded by the government’s health department, supplies the row and chest press. The curl follows Harvard Health.
Seated row (upper back, shoulders, arms)
- Sit in a sturdy chair and wrap the band around the bottom of one foot. Make sure it cannot slip.
- Hold each end of the band. Keep that leg straight with the heel on the floor.
- Start with your arms straight in front of you.
- Pull until your hands reach the sides of your chest.
- Gently return to the start.
Seated chest press (chest, shoulders, arms)
- Wrap the band around the chair or around your upper back.
- Hold each end of the band, with your hands at the sides of your chest.
- Push both arms out in front of you.
- Slowly bring your hands back.
Biceps curl (front of the upper arms)
- Place the middle of the band under your feet. Standing, use one foot and keep the other foot slightly behind it for balance.
- Hold an end in each hand, with your arms down at your sides and palms facing forward.
- Bend your elbows and raise your hands toward your shoulders. Keep your upper arms still and your elbows close to your body.
- Slowly lower your hands.
Return slowly on all three moves. Let the band pull your hands back under control.
Moves 4 and 5: legs, seated
Both moves stay in the chair. Do 8 to 12 reps with one leg, then switch.
Seated leg press (legs)
- Wrap the band around the bottom of one foot and hold both ends.
- Slowly bring your knee toward your chest.
- Push your leg out in front of you until it is comfortably straight. Keep control and avoid locking your knee.
- Slowly bring your knee back toward your chest.
Seated leg extension (thigh muscles)
- Tie the band around the front leg of your chair.
- Sit down and place the band around the front of one ankle.
- Start with your foot on the ground.
- Straighten your knee so your foot lifts off the ground.
- Slowly lower your foot back down.
LiveUp says this move may help with knee arthritis. If you have knee arthritis, talk to a health professional before you use it for that.
Moves 6 to 8: legs, standing with a chair
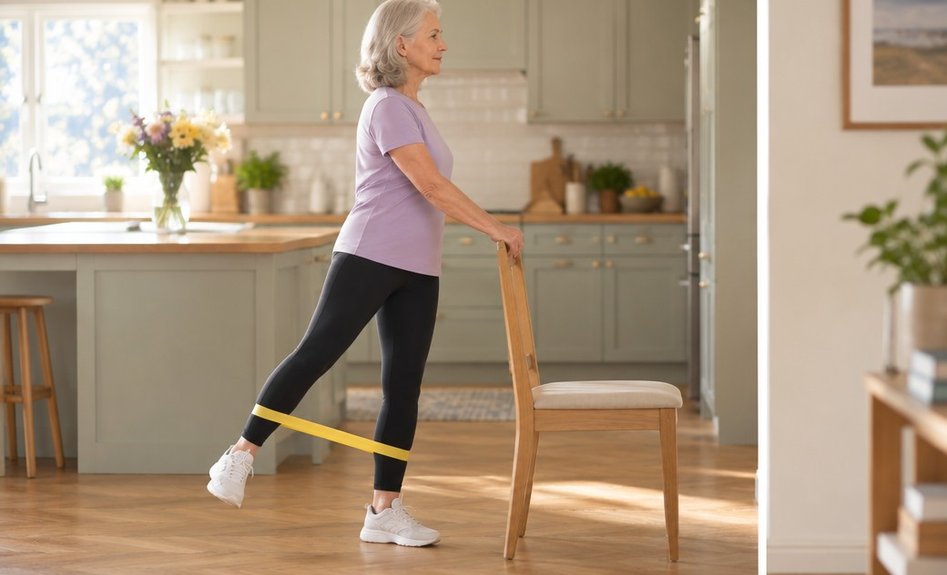
Harvard Health describes these three with a loop of band, so tie the ends of your strip together first. Stand behind a chair with your feet together and hold the chair back with one or both hands.
Standing side leg lift (outer thighs and hips)
- Loop the band around both calves.
- Shift your weight onto your left leg.
- Keep your right leg straight and lift it to the side, until your foot is about six to 12 inches off the floor. Do not lean.
- Lower the leg slowly, so the band does not pull it back down.
Standing hamstring curl (backs of the thighs)
- Loop one end of the band around your right calf. Loop the other end around the middle of your left foot and stand on it.
- Bend your right knee and bring your heel toward your buttock as far as you can.
- Do not move your hips or arch your back.
- Slowly lower your foot to the floor.
Standing hip extension (buttocks and backs of the thighs)
- Place the loop around both calves and shift your weight onto your left leg.
- Keep your right leg straight and lift it behind you until your foot is about six to 12 inches off the floor.
- Tighten the buttock of your standing leg. Do not move your hips or arch your back.
- Bring the leg back to the start.
Eight to 12 reps on each leg make one set. Harvard Health counts the leg moves that way.
Sets, reps and days for a beginner
Start with one set of 8 to 12 reps of each move. NIA says that one set is effective, and that two or three sets may be more effective.
Begin with 8 reps and build toward 12 as the move gets easier. If 12 is easy, try a shorter grip on the band.
Plan two sessions a week, with at least one rest day between them. NIA recommends strength work on at least two days a week, but not the same muscle group two days in a row.
When one set feels easy, add a second. On the leg moves, Harvard Health suggests up to two sets, with a minute of rest between them.
For more to do from a chair, chair exercises that build strength adds upper-body and lower-body moves, including one with a band.
Check your band before every session
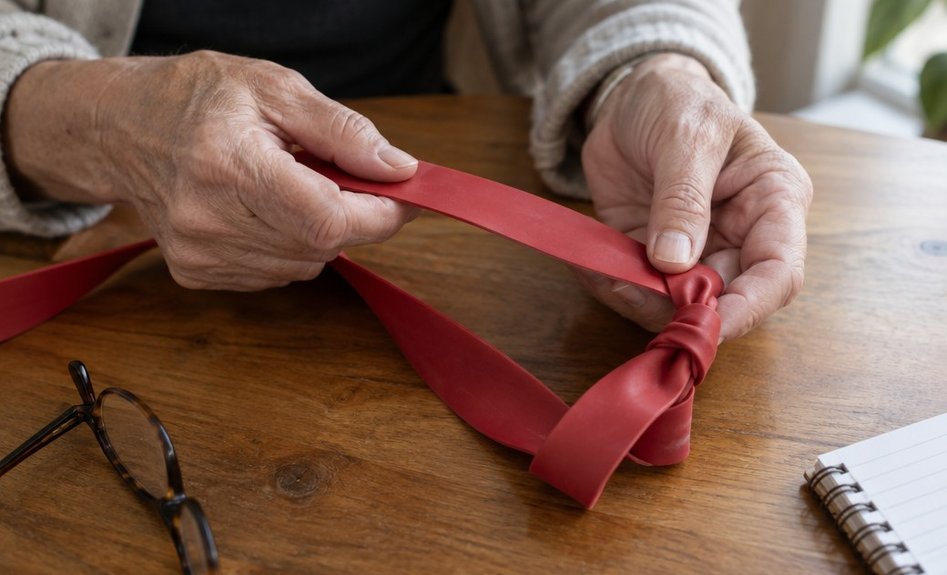
THERABAND says to inspect a band for damage before and after each use. Pay attention to any spot where it was tied, anchored or attached to handles.
A band that is torn, punctured or nicked should not be used again. THERABAND says to discard it right away.
Before your next session, run the band slowly through your fingers from end to end.
Look closely at the knot and at the places that touched your feet. If you find a nick, a hole or a tear, throw the band away.